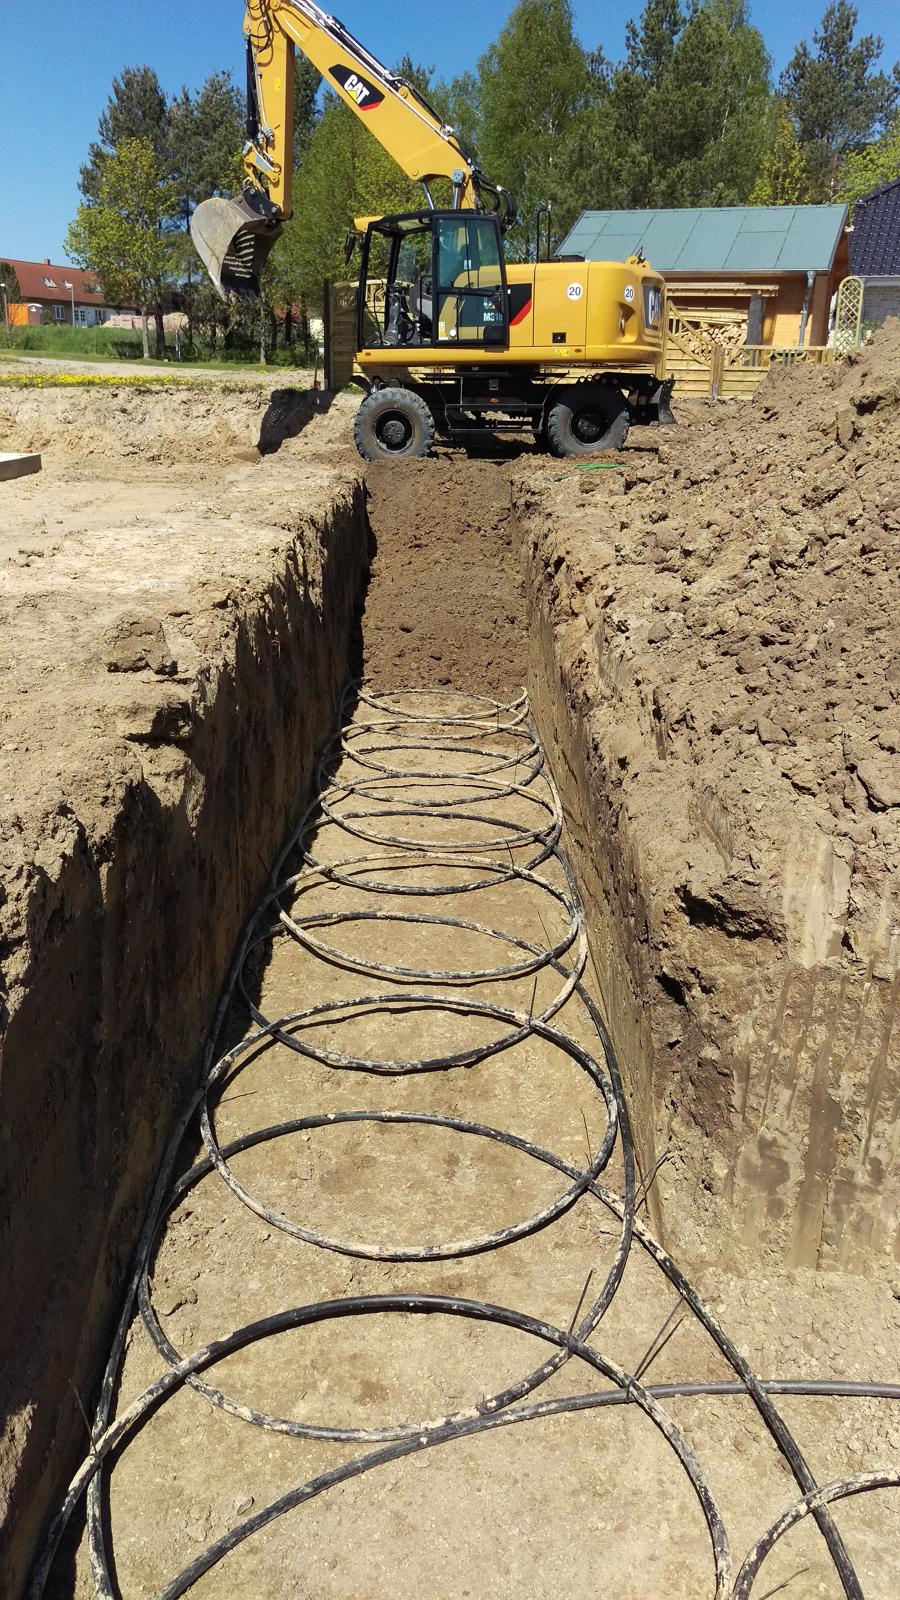
Ring Trench Collector
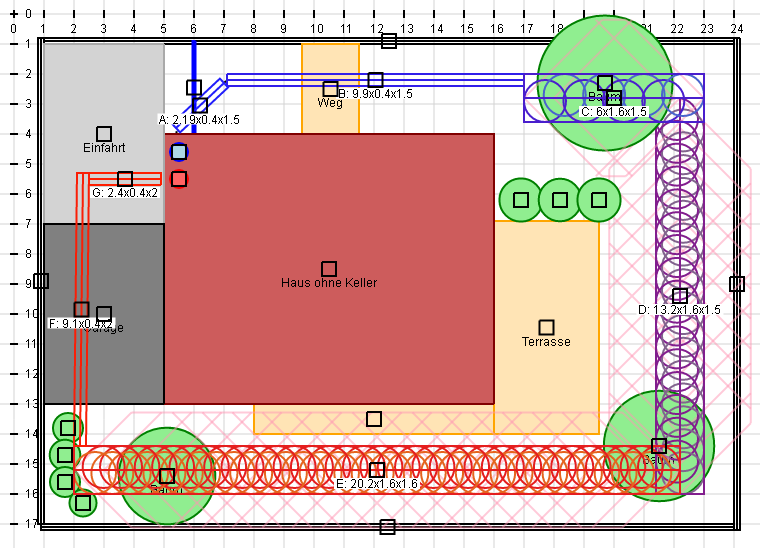
The Ring Trench Collector (also known as slinky geothermal loops in a trench) is a simple to build and space saving heat source for brine heatpumps. This Software can be used for interactive planning as a painting software. First you have to draw the garden including borders, house, garage or carport, terrace, water pipes and other important attributes. After that you could place the brine manifolds (preferred inside the house next to the heatpump) and a possible layout for the Ring Trench Collector. As you have given the heating load, the soil type and the standard outside temperature in the project window the heating power of the collector could directly be calculateed.
Advantages of the Ring Trench Collector
- Geothermal energy could be used even on small estates
- Much more cheaper than a geothermal drilling, cheaper than a conventional horizontal collector
- Own work for price reducing easy possible
- More soil volume is accessible compared to a horizontal collector with less excavation work
- More pipe meters compared to a drilling or a horizontal collector
- Turbulent flow with better heat transfer compared to the horizontal collector
- With comprehensive simulations verified dimensioning recommendations
- Planningtools, support and various field reports available
- Individual plannung and dimensioning fitting exaclty to the requirements
- In Germany the BAFA supports brine heatpumps with up to 6750 EUR
Windows of this program
The functionality is spread on different windows. These will be presented here. You can open all of them with the Menu->Window.
| Collection of the base information as location, soil type, standard outside temperature, count of pipes and heating load of the house. | |
| All elements you can use for your drawing like house, terrace, water pipe, parts of the collector can be chosen and adjusted. | |
| The parts of the collector will be assigned with a different amount of pipe. All parts are shown in a table. | |
| After fixing the project information the dimension chart shows possible Ring Trench Collector dimensions for an overview. | |
| If you have an EnEV-calculation it is possible to estimate the heating load. | |
| Setting like your username independent of your projects. |
Manual
You can use windows as known from desktop programs. With a drag of the title you can move a ccomplete window. In the right upper corner you find an X for closing each window. With the menu which will be shown in the left upper corner after closing this intro window you can reopen all closed windows.
Calculate the heating power of a collector
After you place a cold and a warm brine manifold in the drawing the program tries to connect all collector parts on the shortest way from cold to warm to form the collector. With the coloring from blue to red you can see the temperature gradiation from cold to warm inside the collector. As soon as it is possible to route a connection from the cold to the warm brine manifold, the possible heating load and the worst case brine temperatures will be shown for this collector layout in the project window.
Save and publish the drawing
The drawing can be saved locally or on the public server of the Heatpump Consumption Database (see the file menu). On your local computer you can only store one single drawing. As you store a drawing on the server, you will get the URL (find it under the menu) after it has been saved successfully. With this URL you can retrieve the drawing later. A complete Overview shows all currently saved drawings of all users. If you want to find your own drawings you have to define your user name (see Menu->Window->Settings). With the URL you can show drawing to other experienced users in typical internet forums like Haustechnikdialog.de in Germany or Energiesparhaus.at in Austria.